Buttons and functions
Time/Calendar mode
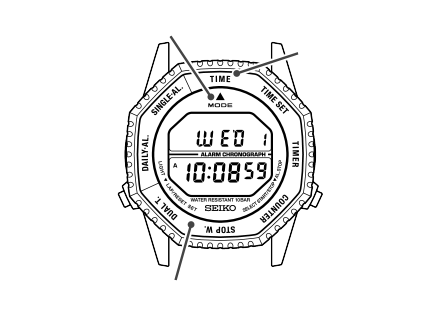
Turn the rotating bezel and align “TIME” with the mode indicator mark ( ) to switch to Time/Calendar mode. The upper row displays the “day of the week” and “day,” and the lower row displays the “current time.”
Button 
Button 
Mode indicator
Rotating bezel
“TIME”
Button :
No effect
Button :
Turns on the light
Holding down Buttons and simultaneously:
Sets/turns off the time signal service/operation confirmation sound,
tests alarm tone
Time/Calendar setting mode
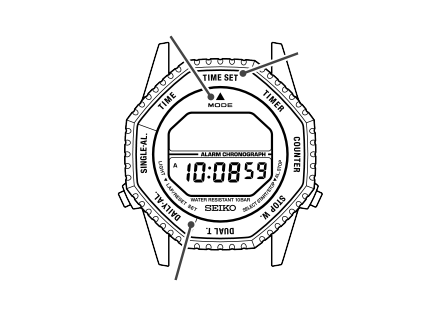
Turn the rotating bezel and align “TIME SET” with the mode indicator mark () to switch to Time/Calendar setting mode. The “time/calendar setting” status is set and the “seconds” indicator blinks.
Button
Button
Mode indicator
Rotating bezel
“TIME SET”
Button :
To select digits to be adjusted
Button :
To set digits to be adjusted
Holding down Buttons and simultaneously:
Resets the system
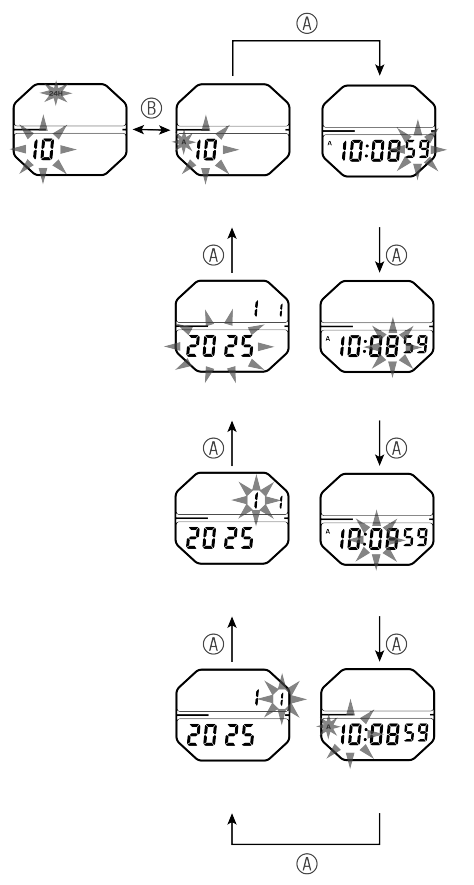
How to set the time and calendar
-
Turn the rotating bezel to align “TIME SET” with the mode indicator mark (
).
The “day of the week” and “day” will disappear and “seconds” will blink. -
Press Button
in accordance with a time signal. The seconds are reset to “00”. -
Press Button
to proceed through the order shown below and select the desired location (blinking). -
After selecting the desired location by pressing Button
, each press of Button advances the blinking number by one. -
When “time/calendar adjustment” is completed, turn the rotating bezel and align “TIME” with the mode indicator mark (
) to return to “time/calendar display.”
If Button is pressed while the seconds digits count any number between 30 and 59, one minute is added and the seconds digits are reset to “00”.
The telephone time signal service is helpful for setting the seconds hand exactly.
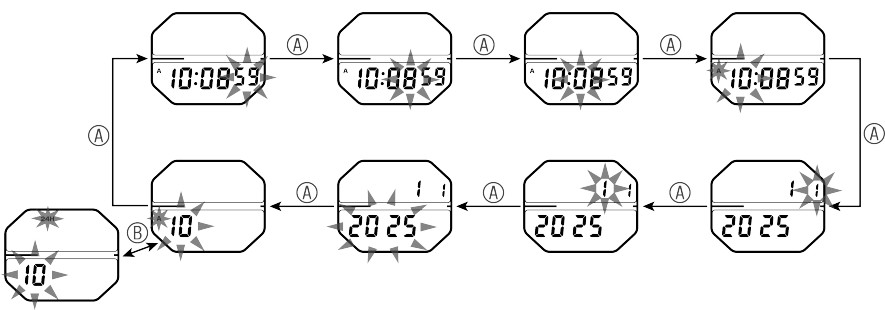
[ Seconds ]
[ Minutes ]
[ 10 minutes ]
[ Hour ]
[ Date ]
[ Month ]
[ Year ]
[12/24-hour format]
[ Seconds ]
[ Minutes ]
[ 10 minutes ]
[ Hour ]
[ Date ]
[ Month ]
[ Year ]
[12/24-hour format]
Once the year, month and date are set, the day of the week is set automatically.
For the 12-hour and 24-hour system setting, each press of Button switches between 12-hour and 24-hour systems.
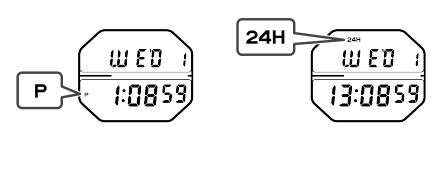
12-hour system
24-hour system
The calendar has a fully automatic calendar function. As the day of the week, day, month, and year from 2025 to 2074 have been programmed in the automatic calendar, you do not need to manually adjust odd and even months and leap years during this period.
Switching between 12-hour and 24-hour system settings also switches alarm time and dual time.
Turning On/Off of Time Signal/Button Operation Confirmation Sound and Alarm Test
In “time/calendar display,” when Buttons and are pressed at the same time, the time signal/button operation confirmation sound can be set or turned off. When set, the time signal mark ( ) lights up. Also, at this time, the alarm tone sounds and can be tested.
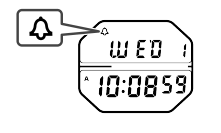
While the hourly time signal/button operation confirmation sound is turned on, the hourly time signal mark () is displayed in any mode.