Points to be checked
Reception was successful (the reception result is displayed as “Y”), but time has been gained or lost.
Check the time zone setting.
Check the time zone and DST (Daylight Saving Time) settings
If the currently set time zone does not correspond to the region where you are, set the time zone by either of the following operations.
Place where GPS signals can be easily received How to adjust the time zone
Place where GPS signals cannot be received How to manually set the time zone
Check DST (Daylight Saving Time) setting.
Check the time zone and DST (Daylight Saving Time) settings
If DST (Daylight Saving Time) setting does not correspond to the addition conditions of DST (Daylight Saving Time) of the region where you are, set DST (Daylight Saving Time) with reference to Turn ON DST (Daylight Saving Time).
Automatic time adjustment may not get activated for a few days.
Automatic time adjustment
The automatic time adjustment function is unlikely to be activated due to low energy stored in the watch or depending on the environment.
To immediately adjust the time, refer to How to adjust the time zone.
Preliminary position
When the watch is unable to display the precise time or date, or the stopwatch 1/20-second hand or multi-function indicator hand does not point to the correct position even when it has successfully received GPS signals, the preliminary position may be misaligned.
The preliminary position is misaligned due to the following reasons.

Strong impact such as dropping or hitting

Things around you which generate magnetism
Examples of common magnetic products that may affect watches
When comparing the state of “Misaligned Preliminary Hand Position” to that of a weight scale, it is like “a scale which is unable to display the correct weight because its needle is not set to the zero position before weighing.”
Setting the preliminary position of the hour, minute, and seconds hands (automatic hand position alignment function)
The “automatic hand position alignment function” automatically adjusts the hour, minute, and seconds hands when the preliminary positions are incorrect.
The automatic hand position alignment function acts once per 12 hours for the hour hand (at noon and midnight), once per hour for the minute hand, and once per 10 minutes for the seconds hand.
This function works when the preliminary hand position is misaligned due to external factors such as strong impact or magnetic influence.
It does not work to adjust accuracy of the watch or slight misalignment which may occur during the manufacturing process.
The preliminary positions of the hour and minute hands can be adjusted manually.
Setting the preliminary position of the sub-dial, stopwatch 1/20-second hand, multi-function indicator hand, date, and hour/minute hands
Setting the preliminary position of the sub-dial, stopwatch 1/20-second hand, multi-function indicator hand, or date
Since the preliminary positions of the sub-dial, stopwatch 1/20-second hand, multi-function indicator hand, and date are not automatically adjusted, they must be adjusted manually.
Preliminary position of this watch
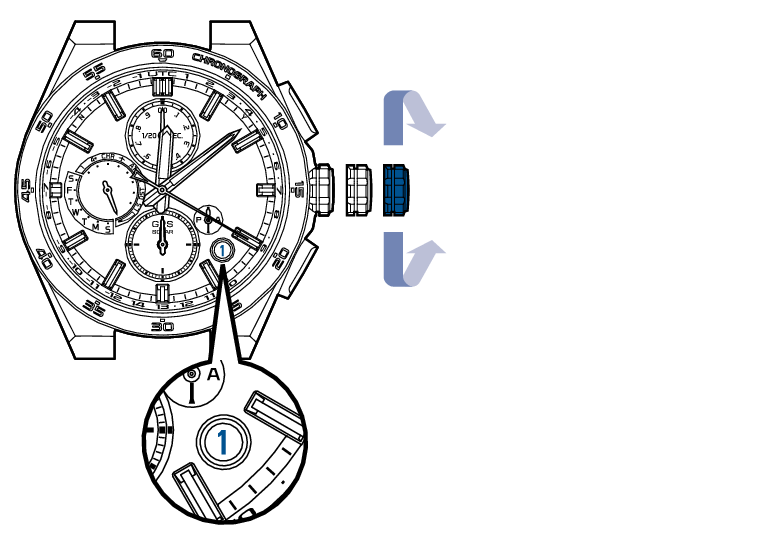
The preliminary position of the date is “1” (1st).
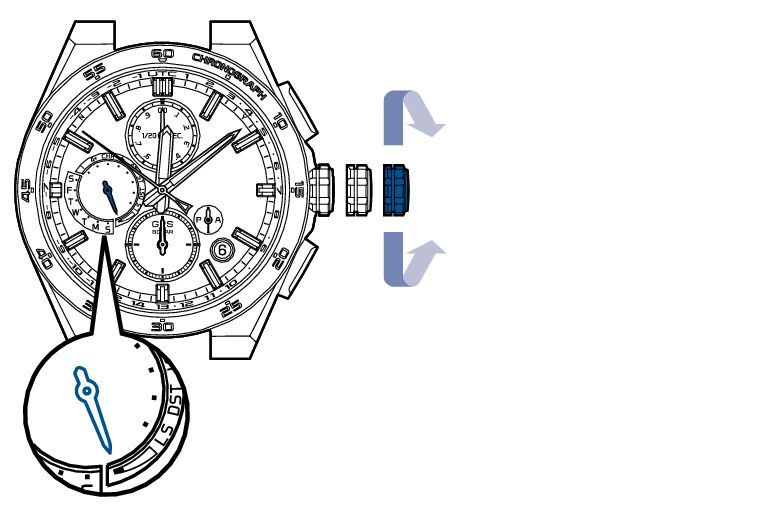
The preliminary position of the multi-function indicator hand is a charging status display of “low.”
The preliminary position of the hour/minute hands is “12:00 AM”.
The preliminary position for the sub-dial and the AM/PM hand is “12:00 AM”.
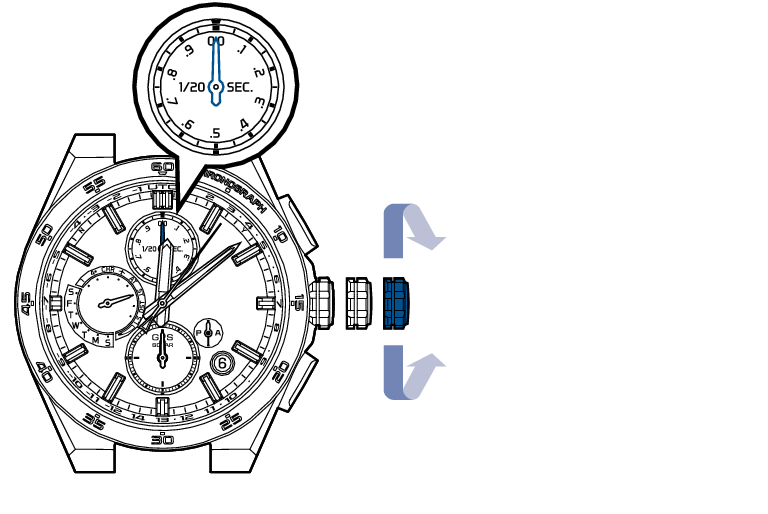
The preliminary position of the stopwatch 1/20-second hand is 0.00 seconds.
Setting the preliminary position of the sub-dial, stopwatch 1/20-second hand, multi-function indicator hand, date, and hour/minute hands
-
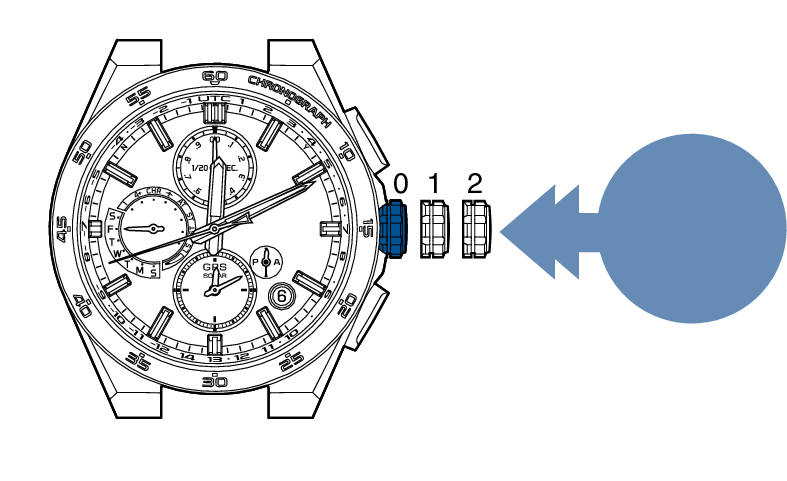
Pull out the crown to the second click
-
Continue to press Button B (3 seconds)
-
Turn the crown to adjust the sub-dial and AM/PM hand to “12:00 AM”
-
Press Button B and then release it
-
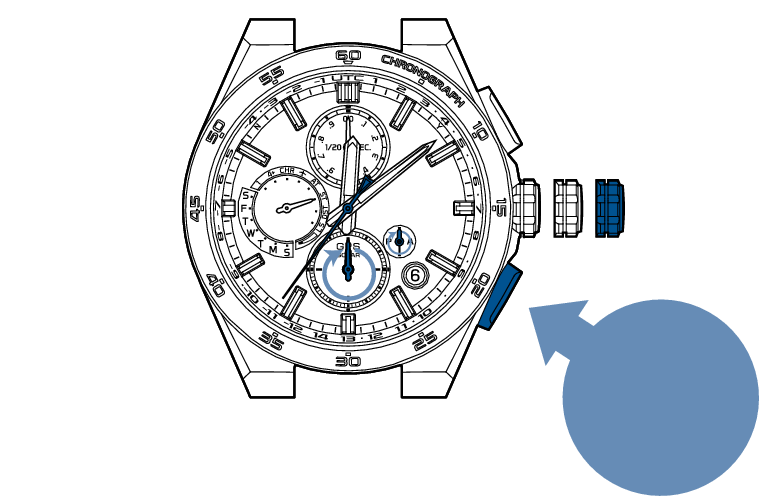
Turn the crown to set the stopwatch 1/20-second hand to 0.00 seconds
-
Press Button B and then release it
-
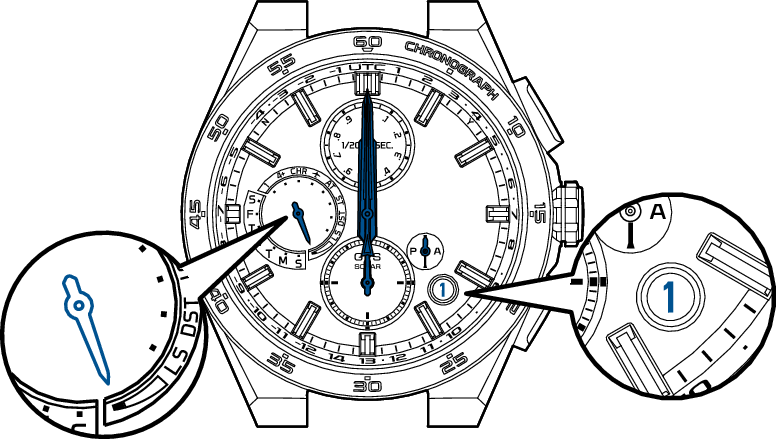
Turn the crown to adjust the multi-function indicator hand to a charging status display of “low”
-
Press Button B and then release it
-
Turn the crown to adjust the date to “1”
-
Press Button B and then release it
-
Continue to press Button A (3 seconds)
-
Push the crown back in
-
Set the time by receiving GPS signals
-
Carry out manual time zone setting
-
Manually set the time
The seconds hand moves to display the sub-dial of the currently set time zone.
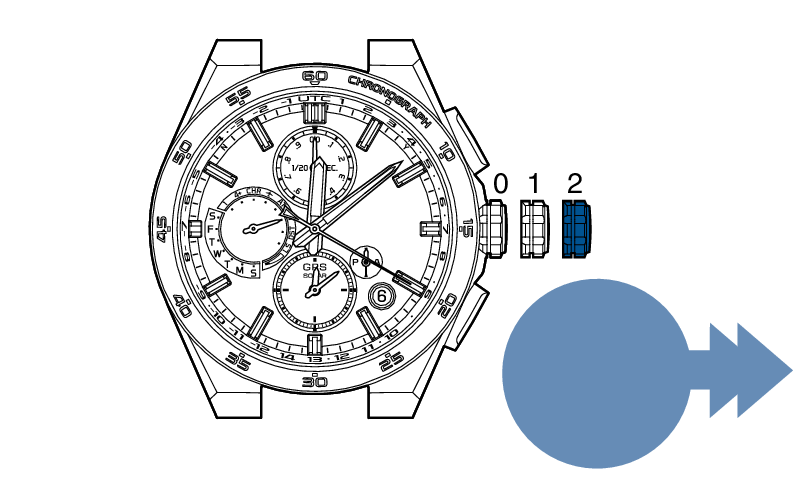
Pull out
the crown to the second click
The watch enters the mode to adjust the preliminary position of the sub-dial.
Press for 3 seconds
The seconds hand stops at the 36-second position.
The sub-dial and the AM/PM hand turn and stop to indicate the preliminary position.
When the sub-dial and AM/PM hand are “12:00 AM”, go to operation  .
.
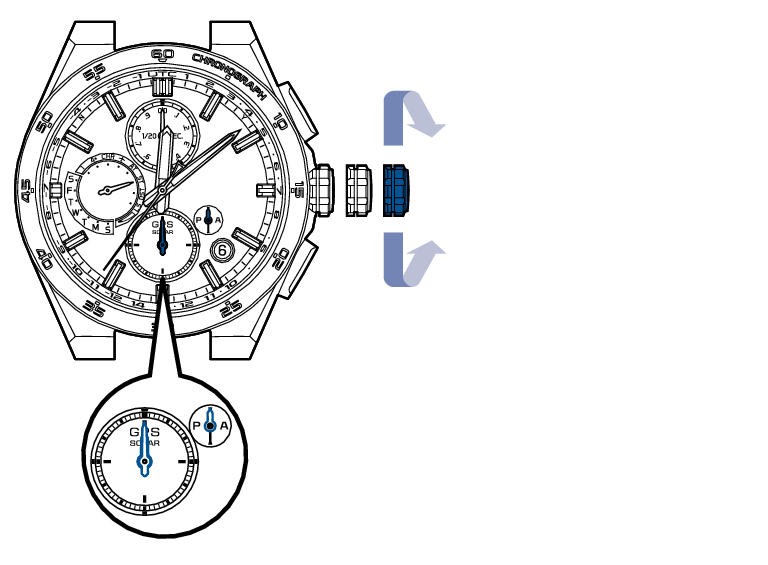
Turn the crown clockwise to advance 1 step.
Turn the crown counterclockwise to set back 1 step.
Turn quickly to move continuously.
Turn again to stop moving.
At this time, the sub-dial and AM/PM hand move along together.
Correctly adjust them to “12:00 AM”.
The watch goes into the preliminary position setting mode of the stopwatch 1/20-second hand.

Press and then release
The seconds hand stops at the 6-second position.
The stopwatch 1/20-second hand turns and stops to indicate the preliminary position.
When 0.00 seconds is displayed, go to operation  .
.
Turn the crown clockwise to advance 1 step.
Turn the crown counterclockwise to set back 1 step.
Turn quickly to move continuously.
Turn again to stop moving.
The watch enters the mode to adjust the preliminary position of the multi-function indicator hand.

Press and then release
The seconds hand stops at the 51-second position.
The multi-function indicator hand stops to indicate the preliminary position.
If the hand is indicating a charging status display of “low,” go to operation  .
.
Turn the crown quickly to move it continuously. Turn the crown again to stop.
Turn the crown clockwise to advance 1 step.
Turn the crown counterclockwise to set back 1 step.
The watch enters the mode for setting the preliminary position of the date.

Press and then release
During movement of the date, the buttons cannot be operated.
The seconds hand stops at the 20-second position.
The date moves, and stops when it indicates the preliminary position.
Adjust so that the numeral “1” appears in the center of the date window.
If “1” appears for the date, go to operation 
Turn the crown quickly to move it continuously. Turn the crown again to stop.
Turn the crown clockwise to advance 1 step.
Turn the crown counterclockwise to set back 1 step.
The watch goes into the preliminary position setting mode of the hour and minute hands.

Press and then release
The seconds hand stops at the 0-second position.
The hour/minute hands move, and stop at “12:00 AM”.
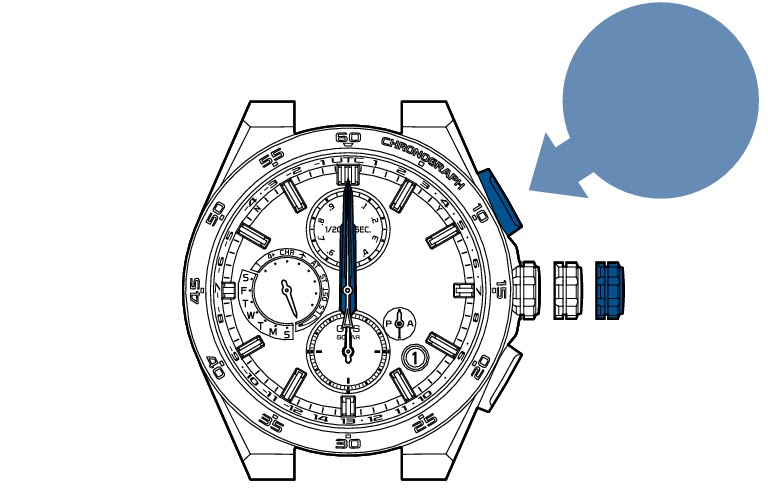
Press for
3 seconds
The watch exits the mode to adjust the preliminary position, and the seconds hand and the hour/minute hands start moving.
Push back in
When you are in a place where GPS signals can be easily received, adjust the time zone.
When operations  to
to  are complete, be sure to set the time.
When you are in a place where GPS signals cannot be received